Measuring & Installing A Replacement Shower
Looking for a replacement shower? Do to the seemingly endless list of bathroom remodeling products available today, the increase of DIY home improvement TV shows and peoples natural drive to “do it yourself “, many skilled homeowners are tackling bathroom renovations in increasing numbers. In this article I will cover the basics of measuring for and the basic practices for replacement of shower bases, replacement bathtubs and shower enclosure replacements in hopes that it may be helpful for you to succeed at installing your own shower or bathtub. From the beginning stages of shower base and tub size measuring instructions to proper shower wall enclosure backer board selection to the finishing touches of easy installation tips for silicone (caulking) application with professional results in your new shower enclosure. Keep in mind that every shower and bathtub is installed a little differently, no home is built the same and adjustments will need to be made to the following bathtub and shower installation procedures.
Call 651-315-9131 For Professional Shower Enclosure Installation In The Minneapolis Area
Measuring For Your Replacement Bathtub
One of the most important considerations for a replacement shower or tub is the dimensions. Width, length and height measurements should all be considered. Most shower base and bathtub manufacturers use what is called “stud to stud” measurements. The first measurement you will need is the thickness of your wall board(sheet rock or plaster). Once you have the measurement of your wall board measure from the outside edge of your tub inward toward your shower or tub enclosure face on the innermost face. Then you add the thickness of your tile or enclosure & your wall board thickness to your exposed tub measurement to get the actual width of your bathtub.
- Width of bathtub= wall board thickness (sheet rock or plaster) + tile or enclosure thickness (usually 1/4″-3/8″) + exposed tub width= complete bathtub width
- Length of bathtub= wall board thickness on both ends + tile or enclosure thickness on both ends + exposed tub length = complete bathtub length
A 30 inch wide x 60 inch long tub will actually measure 29 7/8 inches x 59 3/4 inches giving you 1/8 inch clearance where your new tub will meet the walls. The extra 1/8″ of room on each side and at the back makes installation much easier. Most bathtubs are 59 3/4″ (60″) in length but the standard tub can be 27 7/8″ (28″), 29 7/8″ (30″) or 31 7/8″ (32″) wide. Bathtub drain location is another measurement to carefully consider. Usually a drain will be near centered on the width of the tub and set 8″ from your studs outward from the tub faucet wall. Not all bathtub manufacturers are the same but it is usually fairly simple to find a spec sheet online that gives you the measurements for the replacement bathtub that you intend to use.
Measuring For Your Replacement Shower
Measuring for your new shower is similar to measuring a bathtub using existing wall board thickness, tile or enclosure thickness and width and length of your exposed shower. Replacement shower bases come in more standard sizes than bathtubs and a few shower base manufacturers offer custom sizing options that allow you to order most any size and footprint you want with the drain location virtually anywhere on the replacement shower base. Standard shower bases are like standard bathtubs. Their actual measurements are generally 1/8″ short of your wall studs on all sides for ease of installation. Drain locations are generally centered on a shower base except when doing a tub to shower conversion. For a tub to shower conversion the drain will usually be centered on the width and 8″ off the faucet wall.
Installing A Shower Base Or Bathtub
Bathtubs and showers should always be installed on a level surface. We like to use a thin set self leveling compound such as Ardex . This is usually the quickest and easiest way to go about making an un-level or uneven bathroom floor level. Next follow these steps for a bathtub or shower base installation.
- Dry fit your new tub or shower base to make sure drain location lines up and that it rests firmly level on your bathroom floor.
- Assuming that everything fits as intended- follow all manufacturers instructions and install your shower base or bathtub. Most bathtubs and shower bases require the use of adhesives to bond them to your bathroom floor and screws to hold them firmly to your wall. Some of the higher end shower bases that we install require only the use of silicone adhesives. No screws are required because of the density and quality of the shower base.
- After you set the shower or tub base in place- have a plumber or qualified individual tighten the shower drain and the overflow for a tub. Check for leaks at this time.
- Assuming everything is leak free and your bathtub or shower base is level you can move on to your backer board installation.
Backer Board Types For A Shower
Whatever wall board you choose make sure that it is mold and mildew resistant. Also make sure to follow your shower surround manufacturers instructions for appropriate wall board. In our opinion there are only a few good options available if you intend on installing a shower surround.
- Moisture and mold resistant gypsum wall board- Gypsum wall board or better known as sheet rock designed for moisture and mold resistance is an excellent shower enclosure backer board. It is light weight and easily accessible at most home improvement stores. Gypsum wall board has a paper face on the front and back sides. Some gypsum wall board only has moisture and mold proof paper faces while other are resistant on the paper face and on the interior gypsum itself.
- Densshield- Densshield is a wall board that was originally designed as a wall and floor tile backer board. It has excellent mold and moisture resistant properties and also bonds well with the silicone adhesives commonly used in a tub or shower surround application. It is easy to install with screws, and is, as far as we are concerned, to be the best single application tub and shower surround backer available today. Densshield is also easily accessible at most local home improvement stores.
Tub and Shower Enclosure Installation
Like any manufactured products not all replacement tub and shower enclosures are created equally. Some are rather flimsy and thin walled using the backer board as their strength, others are designed to install right over the top of existing enclosures or tile (bath wraps) and others are thick walled, durable panels that are custom ordered and cut to fit your new shower or tub. Whatever enclosure you choose to go with make sure shower products are installed per manufacturers specifications and directions.
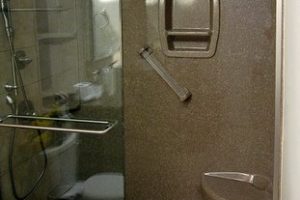
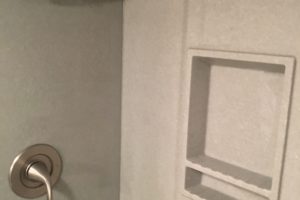
VanVleet Construction installs The Onyx Collection shower systems. Our shower enclosures are the thick walled type. Every wall panel, ceiling panel and shower base are custom ordered to fit every angle and measurement of your new shower or bathtub enclosure. Our shower products not only look great, they are guaranteed for a lifetime!
Shower Silicone and Caulking
Caulking and Silicone around a tub and shower when not applied correctly, or the wrong product is used, can often times leak or become full of mildew and mold. There are countless types of tub and shower caulking products available to consumers today. There are whole isles dedicated to sealants at your local home improvement stores that claim to stop mildew, last for 30+ years with super power micro-ban, paint ready in 20 minutes, $15 a tube, mold proofing awesomeness! They probably won’t and they probably are not awesome.
Prior to replacement most shower enclosures or bathtubs we have replaced have had visible mildew and or visible water damage in the wall or under the shower. Some of these enclosures had tiled walls with failed or unsealed grout. Some were manufactured shower or bathtub wall enclosures with dried, cracked or mildewed caulking around the perimeters. with failed or insufficient wall board underneath. Either way you shake it- the damage had been done. A shower replacement was in order and this time it was going to be completed with the right products using the right procedures with VanVleet Construction.
100% silicone is the only sealant that should be used on any replacement tub or replacement shower surround. Any other product is either liable to crack, come loose from either the shower enclosure, bathtub or the shower base. 100% silicone applies evenly and with a little bit of denatured alcohol in a spray bottle it can be installed with professional results every time.
- Clean your shower base and walls- Any foreign matter (sheet rock dust, dirt, oils from your fingers) or particles and dirt that get into your silicone can and will after time harbor mildew and mold. Thoroughly clean your entire bathroom, shower, tub and even your hands before starting the silicone application process.
- Applying silicone on your shower base- Once the bathtub or shower base is set in place and the walls (enclosure) are installed. Use a properly sized caulking gun and apply 100% silicone (color matched or clear) where the base and enclosure walls meet. Making sure the silicone comes in contact with both edges evenly and entirely.
- Denatured Alcohol- Using a spay bottle set to mist. Spray the freshly applied silicone with denatured alcohol.
- Using your finger to smooth the silicone- Spray a little denatured alcohol on your finger and use your finger to smoothly wipe the silicone. Denatured alcohol prevents the silicone from sticking where you don’t want it to stick.
- Use paper towels- Using a wipe of your finger to smooth the silicone that seals your new replacement shower enclosure make sure to wipe your fingers clean with a paper towel before your next smoothing wipe. You may need a hole roll of paper towels for one shower enclosure install.
We hope that you found this article somewhat useful. It is intended for basic bathtub, shower base and shower wall enclosure and surround installation purposes only. It is intended only to give you the basics and a few ideas that might help you along the way to your DIY bathroom remodeling projects. Keep in mind that every shower and bathtub is installed a little differently, no home is built the same and adjustments will need to be made to these bathtub and shower installation procedures.
Call 651-315-9131 For Professional Bathroom Remodeling, Shower Enclosures & Bathtub Replacements
Minneapolis Area Bathtub To Shower Conversions / Cast Iron Bathtub Cutting Test


